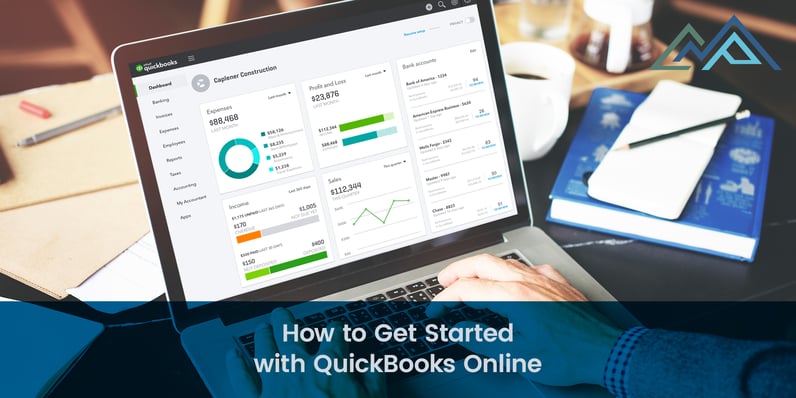
You may already know that QuickBooks is one of the most popular accounting software options for businesses. What you may not know is how to begin using it.
At CMP, we often recommend QuickBooks to our business clients. We also provide QuickBooks services. One of the most common questions we get is this:
Can you help me get started with QuickBooks?
The short answer is yes, but we go beyond that. Here’s a beginner's guide to getting started with QuickBooks Online.
Step #1: Set Up Your Company in QuickBooks Online
The first step to QuickBooks accounting is setting up your company in QuickBooks Online. For the purposes of this post, we’ll assume you’ve already created a QuickBooks account.
Sign in with your new ID and password. You’ll get a screen that looks like this:
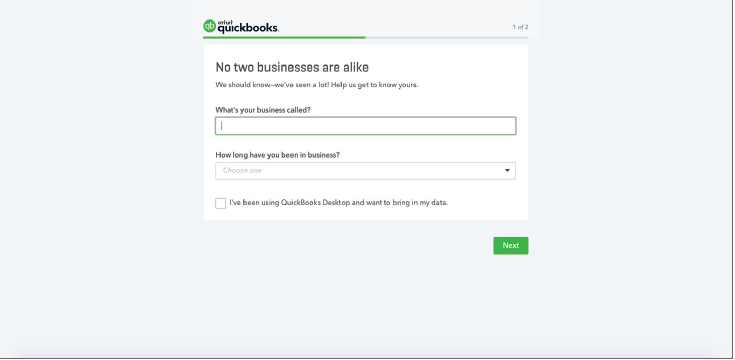
You’ll need to fill in:
- Your company’s name
- How long you’ve been in business
You’ll notice at the bottom there is an option to check if you have been using QuickBooks Desktop. If you have, this option will allow you to import your data if necessary.
On the left, you’ll see a menu with “Company” as the first option. Select that option and you’ll gain access to a series of screens where you can add information about your company.
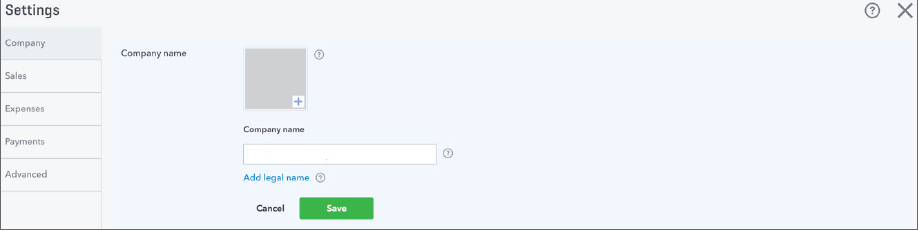
The above screen is an example of what you will see after selecting the “Company” option. You’ll begin by entering your company name again. Make sure to use your legal name. You can also add a company logo. Adding a company logo will ensure that any documents you create in QuickBooks, including invoices and reports, have your company’s branding on them.
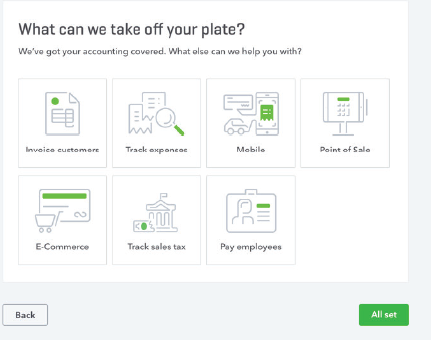
After that, you’ll see this screen where you can specify which accounting functions you want to use QuickBooks Online for:
Walking through the rest of the business setup screens will allow you to:
- Choose a business type (Partnership, LLC, Corporation, etc.)
- Enter your business address
- Enter the URL of your website
- Enter a client-facing email (if you skip this step, it will default to your company email)
This first step will ensure that your information is correct in QuickBooks Online.
Step #2: Choose Your Accounting Options
The next step to getting started with QuickBooks Online is to specify the accounting methods you want to use. The default option is Accrual Accounting. This can be changed by clicking the “Advanced” tab on the menu, and other important information can be specified here as well.
The Accounting option screen looks like this:
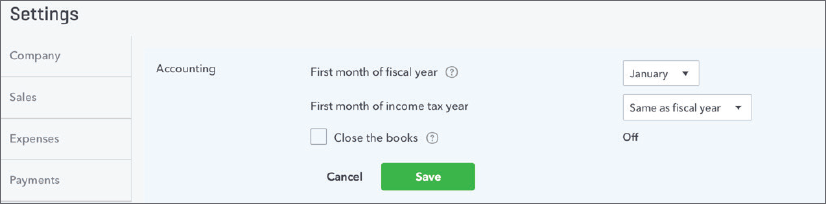
Here, you can:
- Select the first month of your company’s fiscal year
- Choose the first month of your income tax year (talk to your accountant about this field)
- Specify when you want to close your books
Checking the “Close the Books” radio button will prompt you to enter the date when you will close your books for a fiscal year. We recommend that our clients also set a password for closing the books to limit access and minimize the risk of errors. If you choose the option to set a password, you’ll be prompted to create a secure password. Share it only with employees who have the authority to close the books.

Step #3: Create Accounts
The area that you will spend most of your time adding information to when getting started with QuickBooks Online accounting is setting up your accounts. We’ve already mentioned that you can import data from QuickBooks Desktop if you have already been using it. If you haven’t, there are still ways to speed up the process.
To import your customers to QuickBooks Online, click the gear icon that is at the top, right-hand corner of the QuickBooks Online screen. From there, you’ll click “Import Data” from the menu. You’ll see this screen:
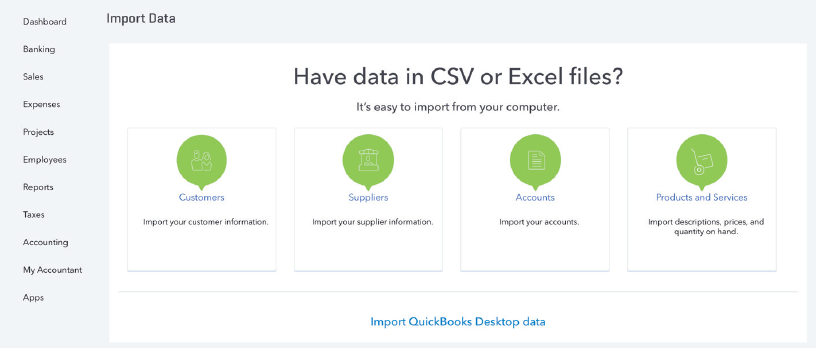
As you can see, you have options to import Customers, Suppliers, Accounts, and Products and Services. The importing process is the same for all four, so we’ll just show you how to import your customers. Click that option, and then browse to the document format (CSV or Excel) that you want to import.
QuickBooks will analyze your document and match your data with the QuickBooks Online fields, as you can see below:
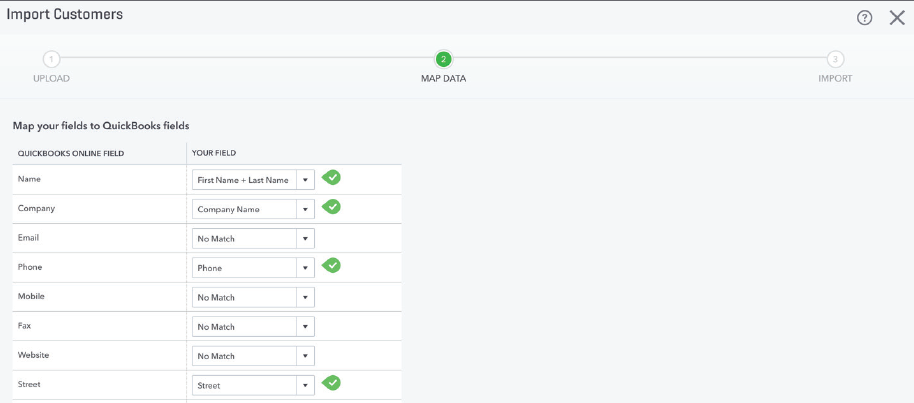
You should review everything to make sure that your data is in the proper place. Once you’ve done that, you’ll import the information and QuickBooks will show you a confirmation screen. Any errors will be highlighted in red and you’ll have the opportunity to correct them.
You can repeat this same procedure for your Suppliers, Accounts, Products, and Services.
Step #4: Sync Your Accounts with QuickBooks Online
The final step before you start using QuickBooks Online for invoicing and accounting is to sync your accounts. Any account you use to pay business expenses or receive money should be synced, including:
- Your business bank account
- Your business credit cards
- Your PayPal account
We strongly suggest keeping your personal expenditures separate from your business accounting.
To connect to a bank account, click Bank Accounts and then Add an Account. You will need to also sign into your bank account, so have your information ready. Once connected, QuickBooks will retrieve the last 3 months' worth of transactions. To get them into QuickBooks, you will need to review and reconcile, or categorize, them. Make sure you set aside some time for this step.
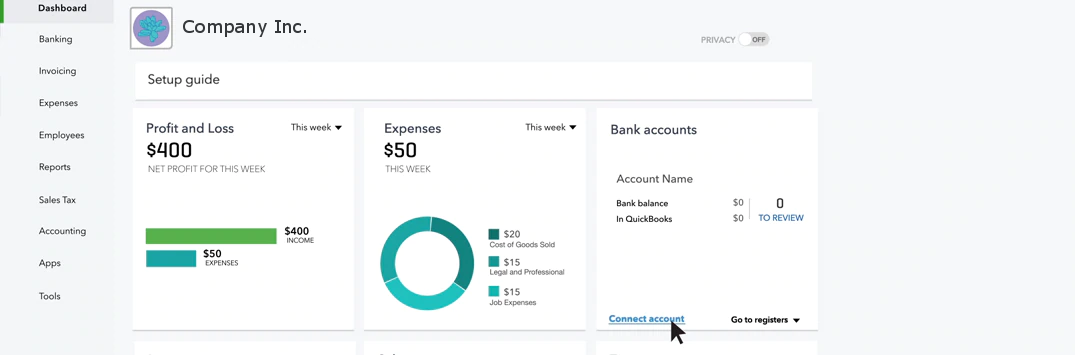
After the sync is complete, you will be able to see information about your bank accounts.
More Tips for Getting Started with QuickBooks Online
QuickBooks bookkeeping and accounting are designed to make managing your company’s finances easy. Here are some pointers to help you get started:
- Create invoice templates. Creating templates requires some up-front work, but makes it easy to create invoices going forward.
- Sync your third-party payroll software to QuickBooks. If you handle your own payroll, make sure to sync your software with QuickBooks Online.
- Use QuickBooks features to manage your risk. For example, you can not approve invoices and shipments to clients who are past due or not approve negative inventory.
- Enable QuickBooks payments to allow your customers to pay invoices through QuickBooks.
- Write checks in QuickBooks. You can use the “Write Checks” tab to pay your suppliers and other expenses such as utilities and rent.
- Get help from a professional accountant. While QuickBooks Online is designed to be used by non-accountants, you’ll get the most from your investment in it if you partner with a pro who understands your business.
Once you’re accustomed to using it, we think you’ll find that it’s a useful tool to manage every aspect of your company’s finances.
Conclusion
QuickBooks Online is a highly recommended, user-friendly accounting software. You can use it to manage everything from invoicing to taxes to payroll.
Need some assistance getting set up with QuickBooks Online? CMP offers a variety of services to businesses using QuickBooks. If you would like help getting started, contact us today.